
After we finished the wall panels (that we later took down to just install studs), we moved onto the ceiling. We knew we did not want a tongue and groove wood look, as we like more of the “industrial rustic modern” look, yeah it is a lot but describes our style perfectly 🙂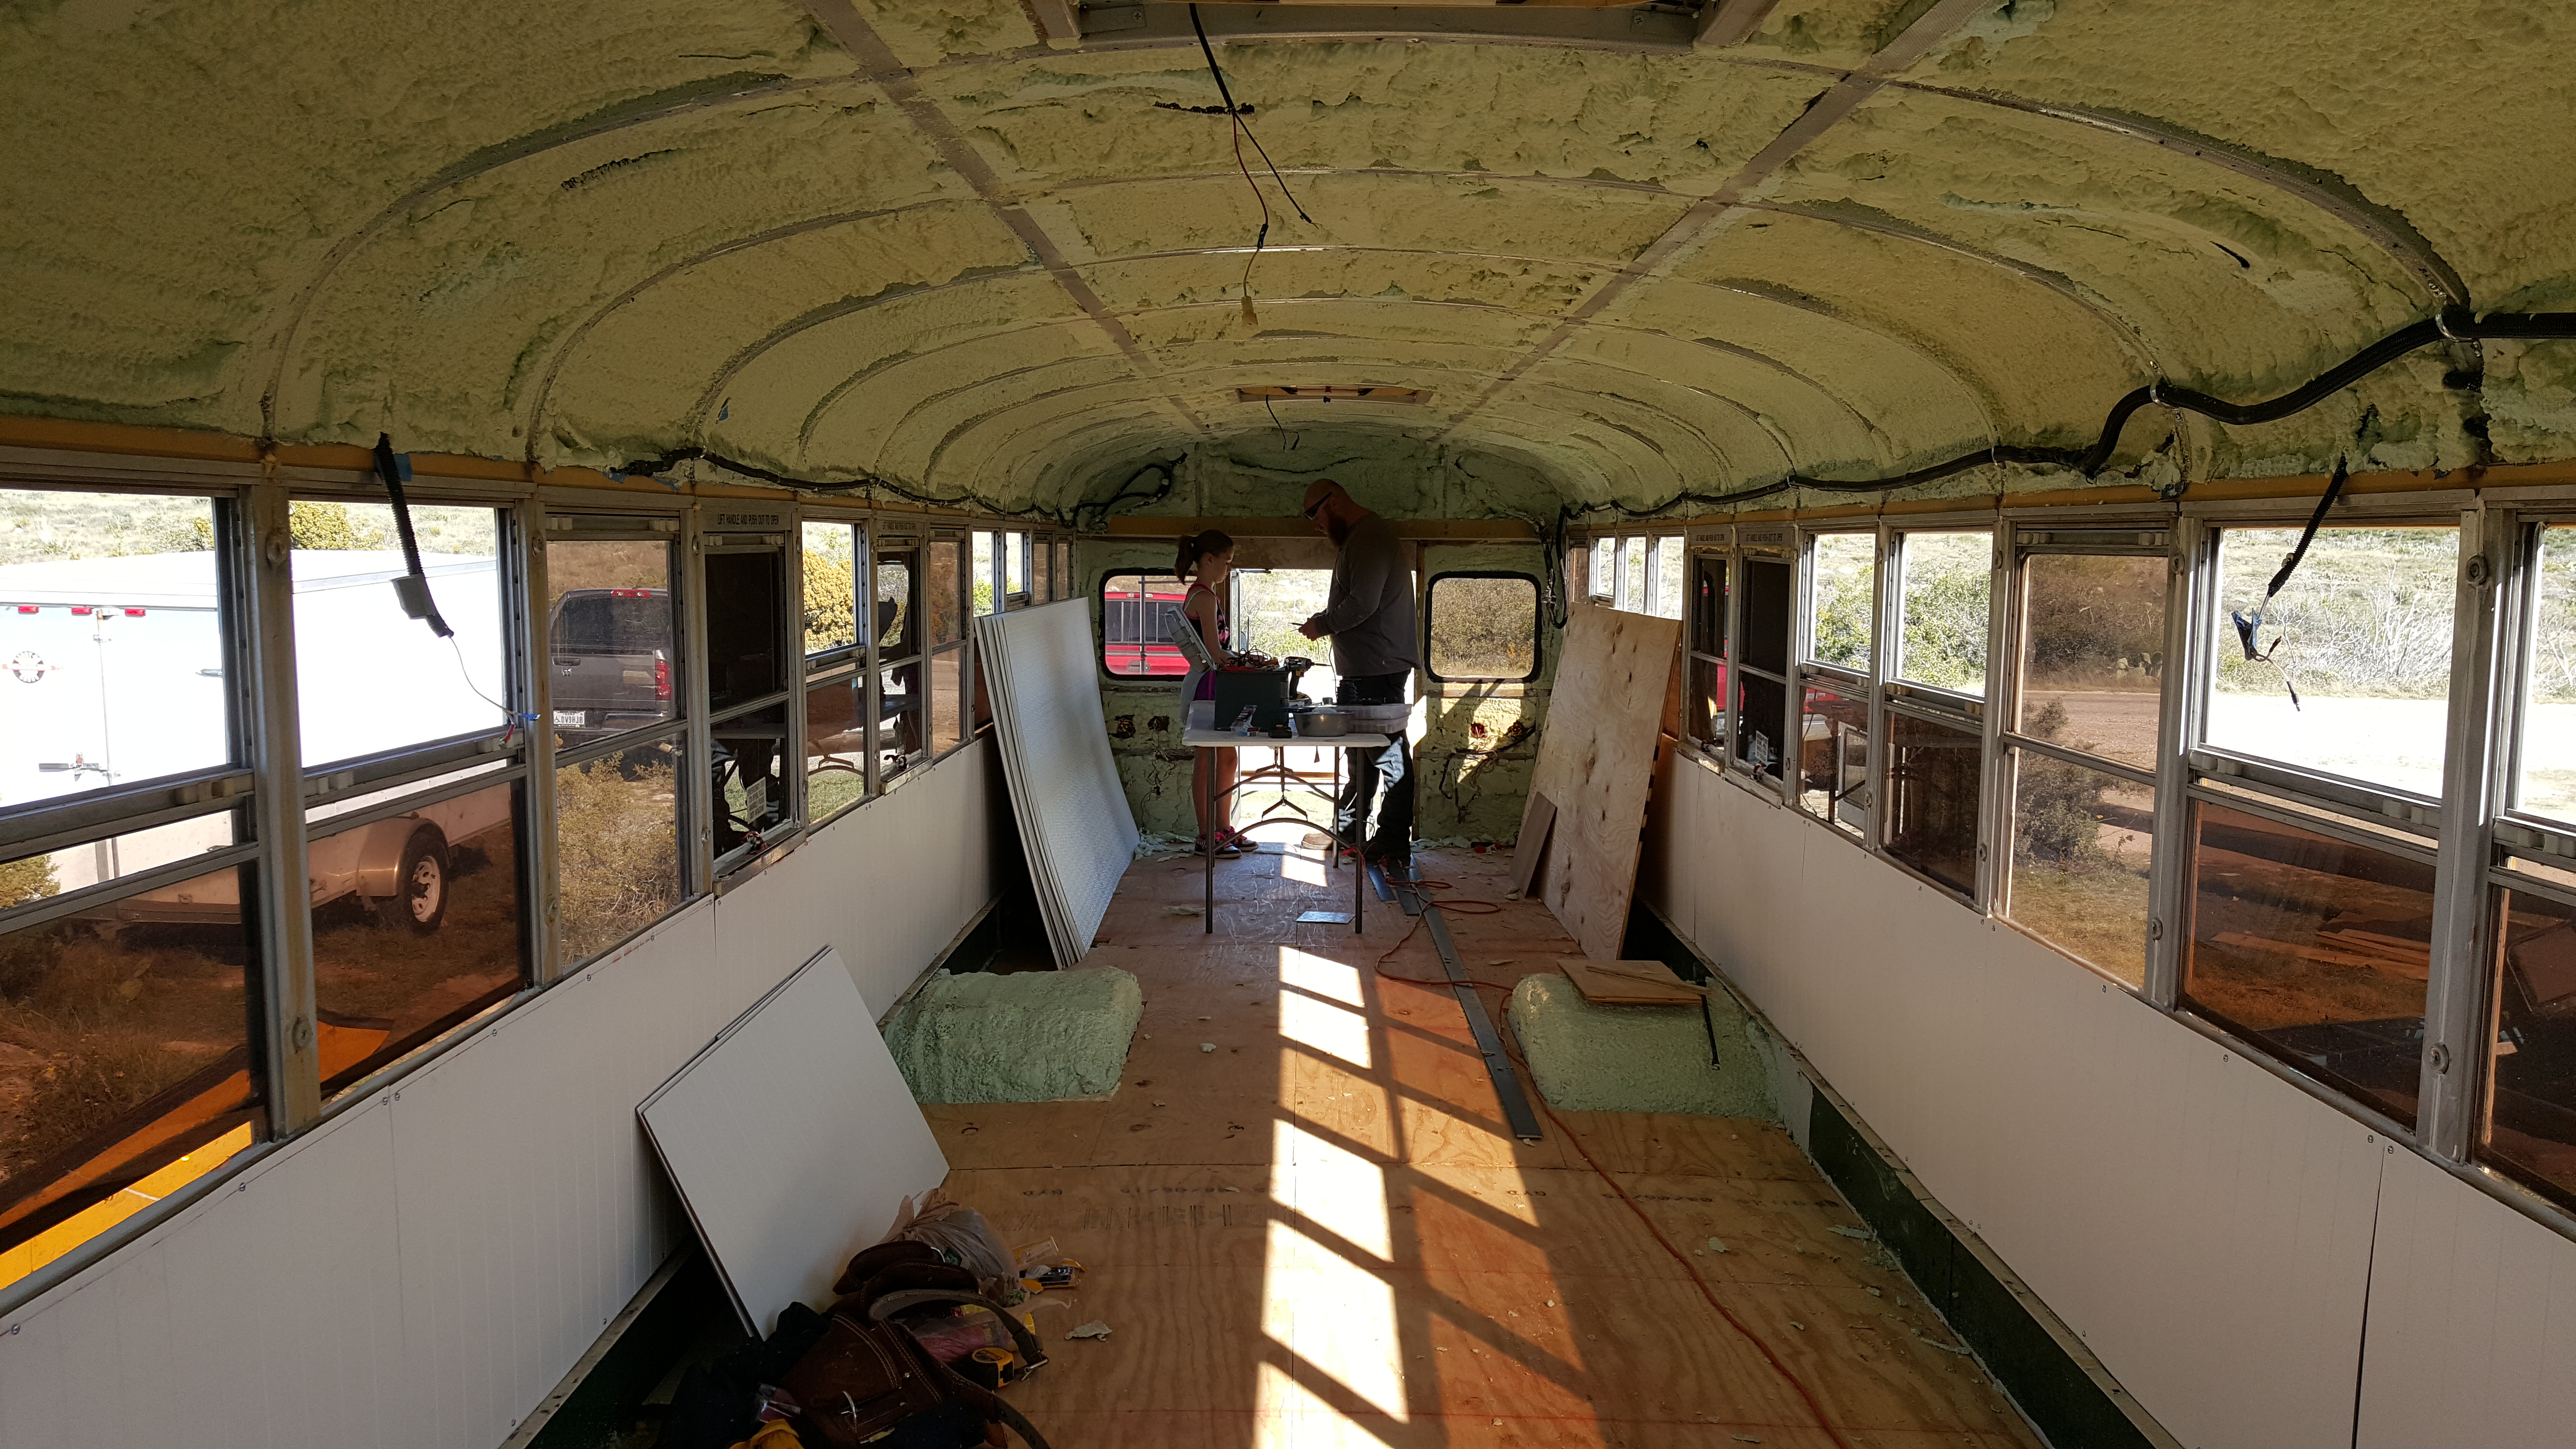
So we found this FRP board from Home Depot that flexed well in the store, and was used in commercial bathrooms for the walls and ceilings. This meant that it was also mold resistant and seemed like a great idea! So we bought a lot, of pieces (maybe 14 or so for extra) and headed home to install.
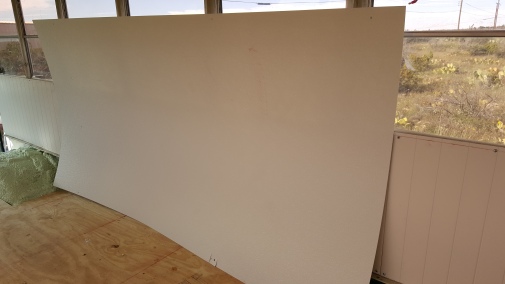
Well, it sounded like a great idea. It appeared to be a great idea. But as we placed the FRP board up and screwed it in, and started curving it, it cracked at the screw place. Ripped right through that board. Maybe there is a better way to fasten that stuff to the ribs. But we did not know of it. Back to Home Depot it went, and back to the drawing board we were.
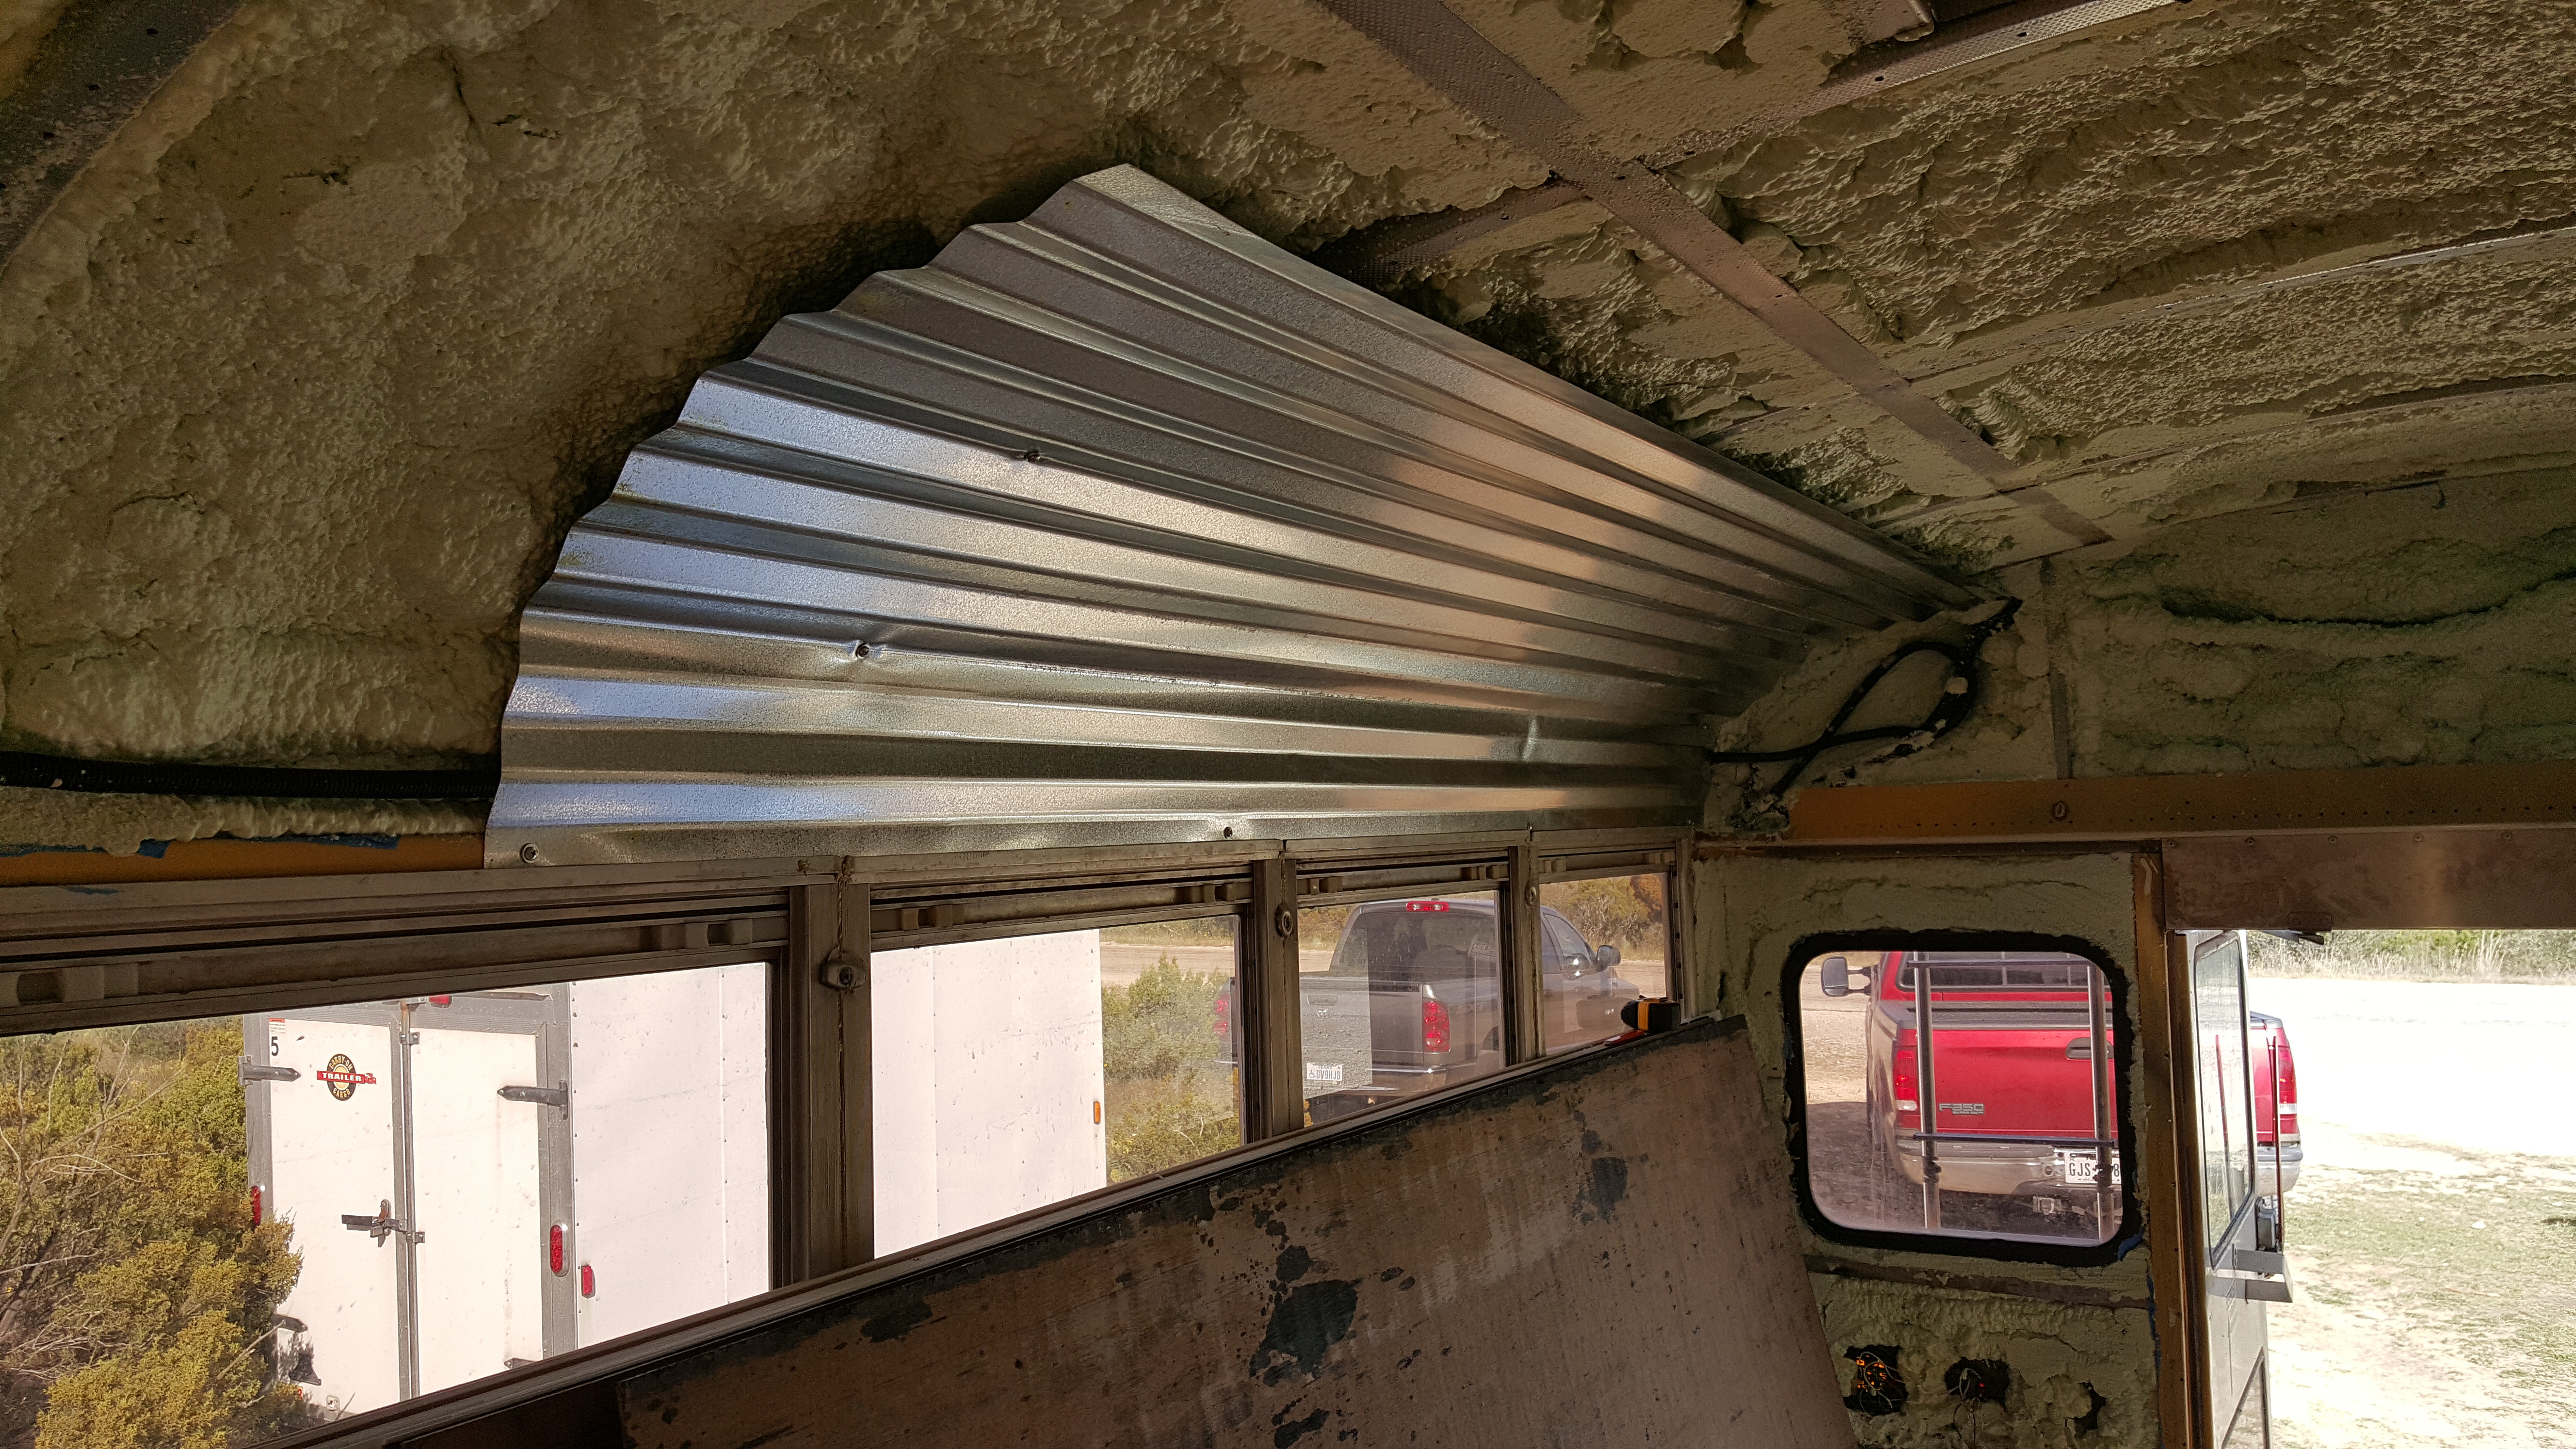
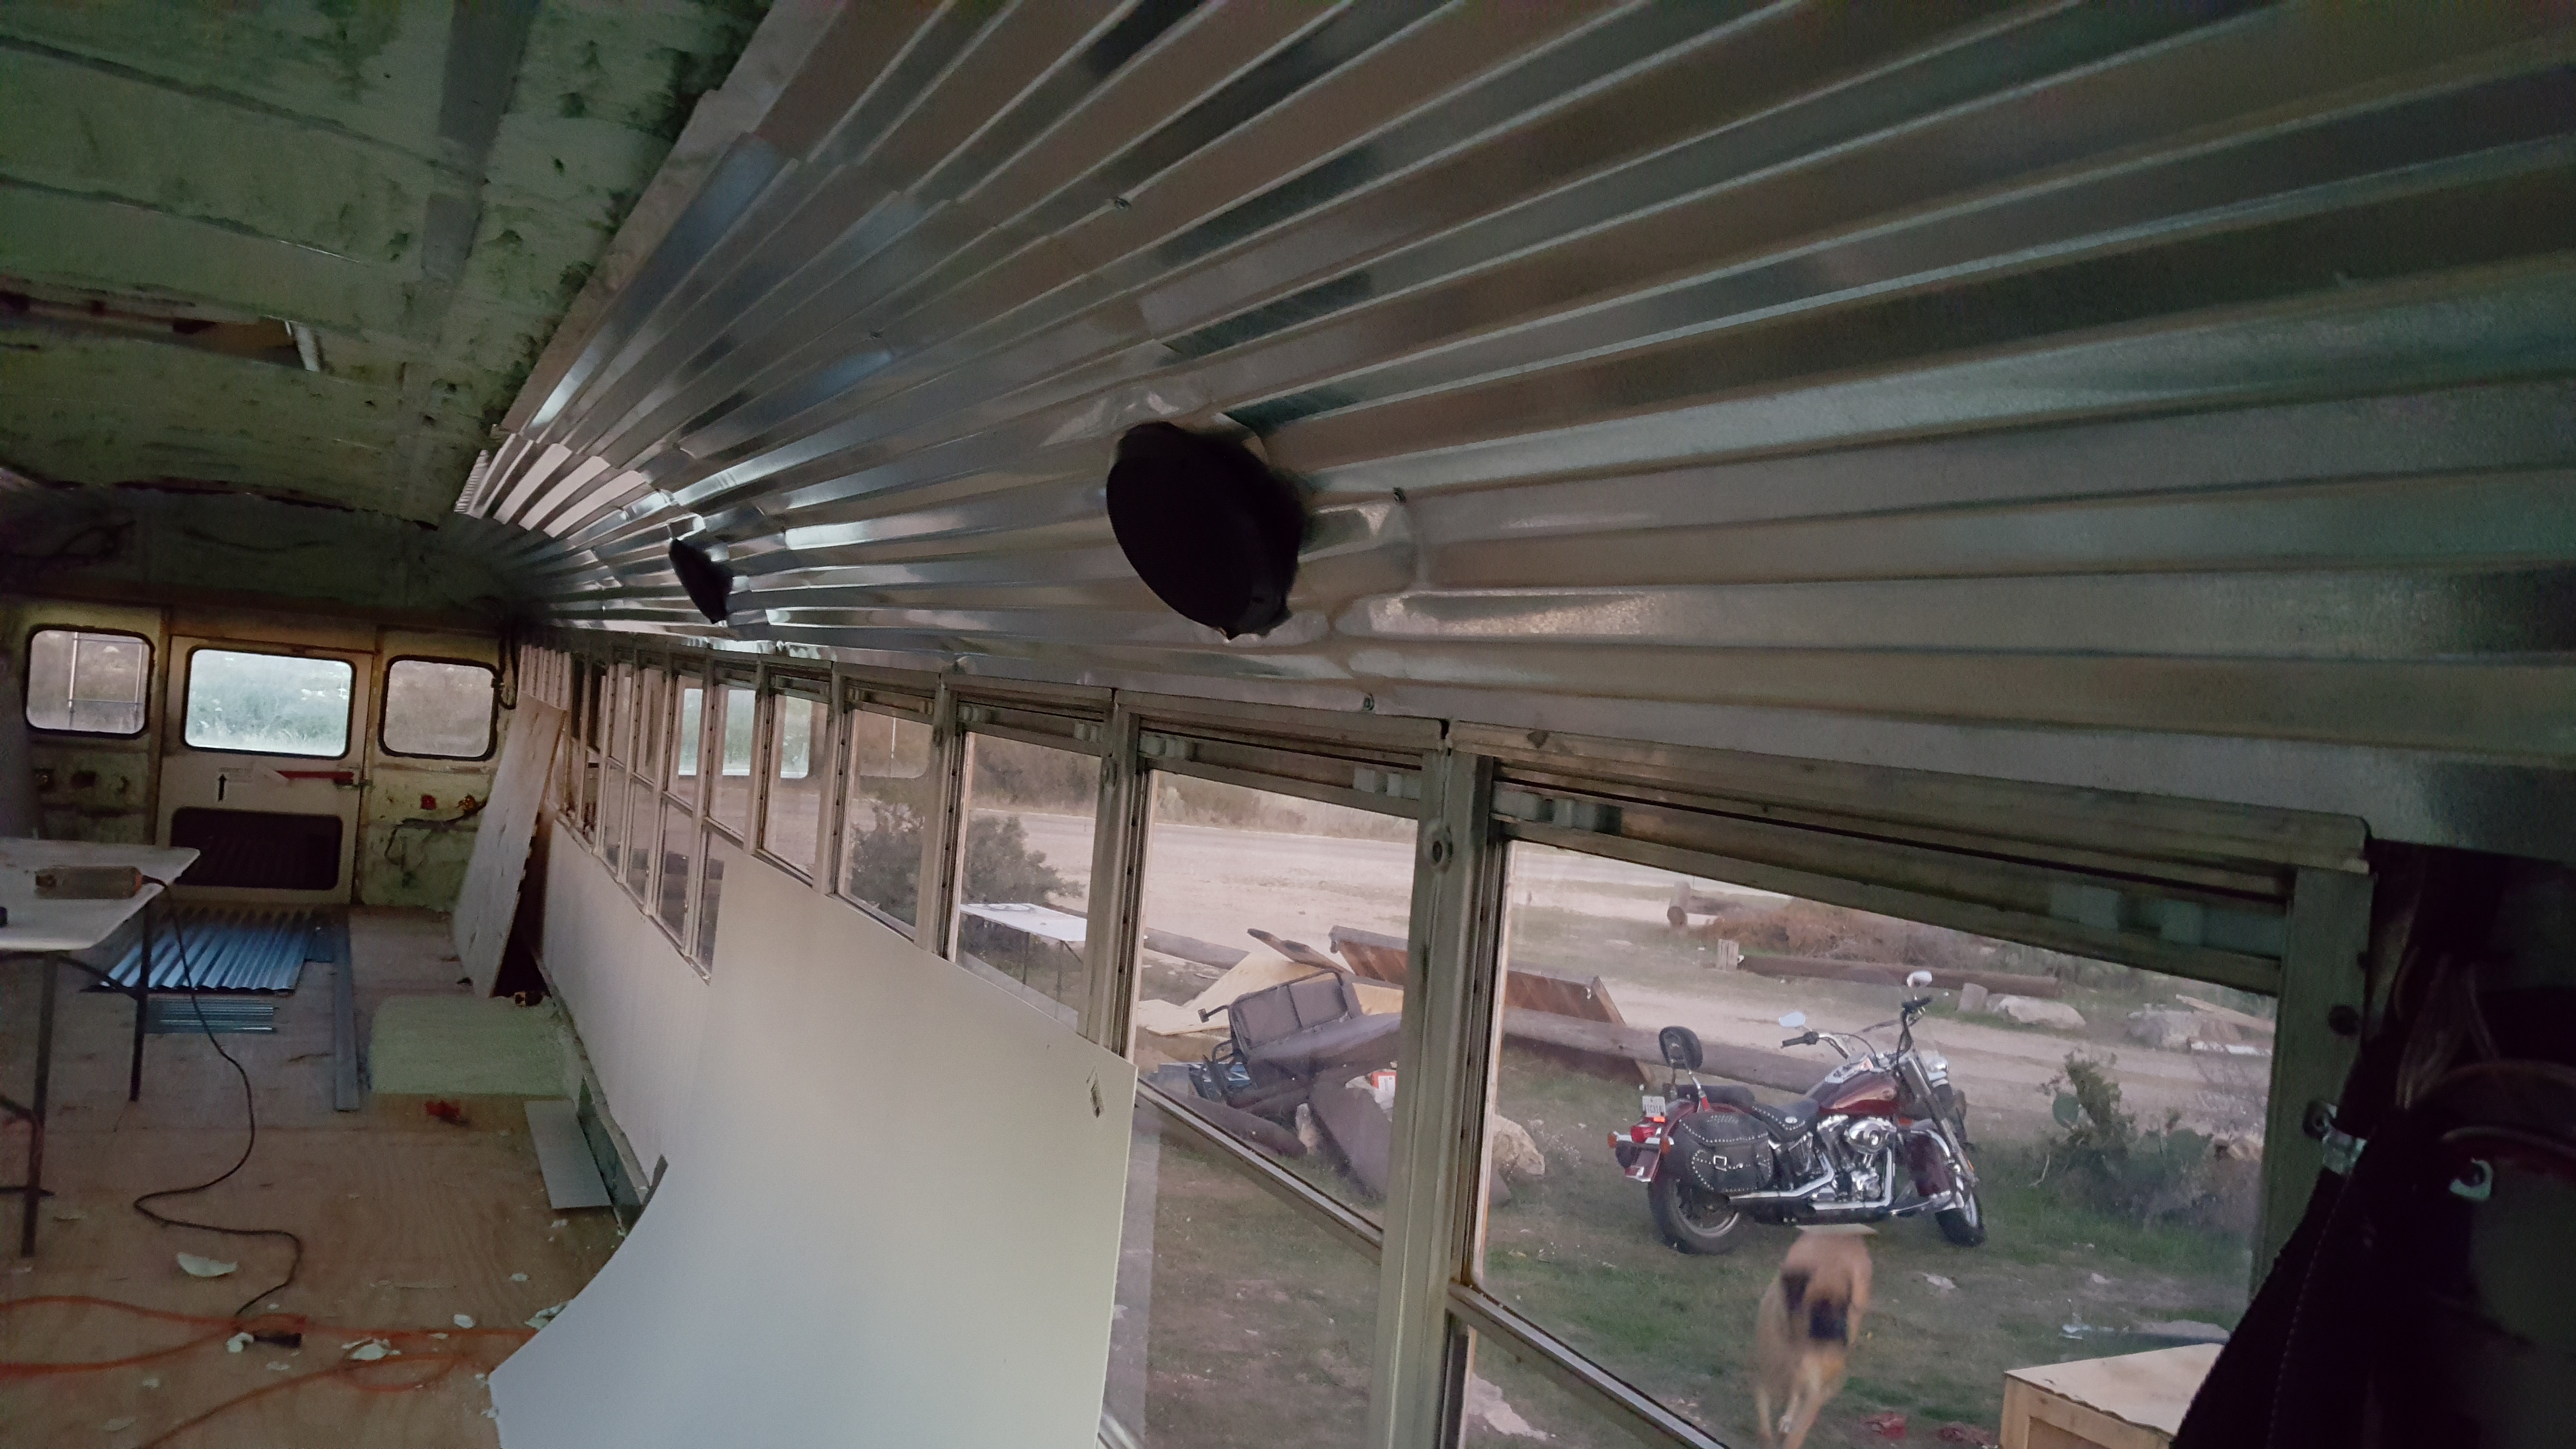
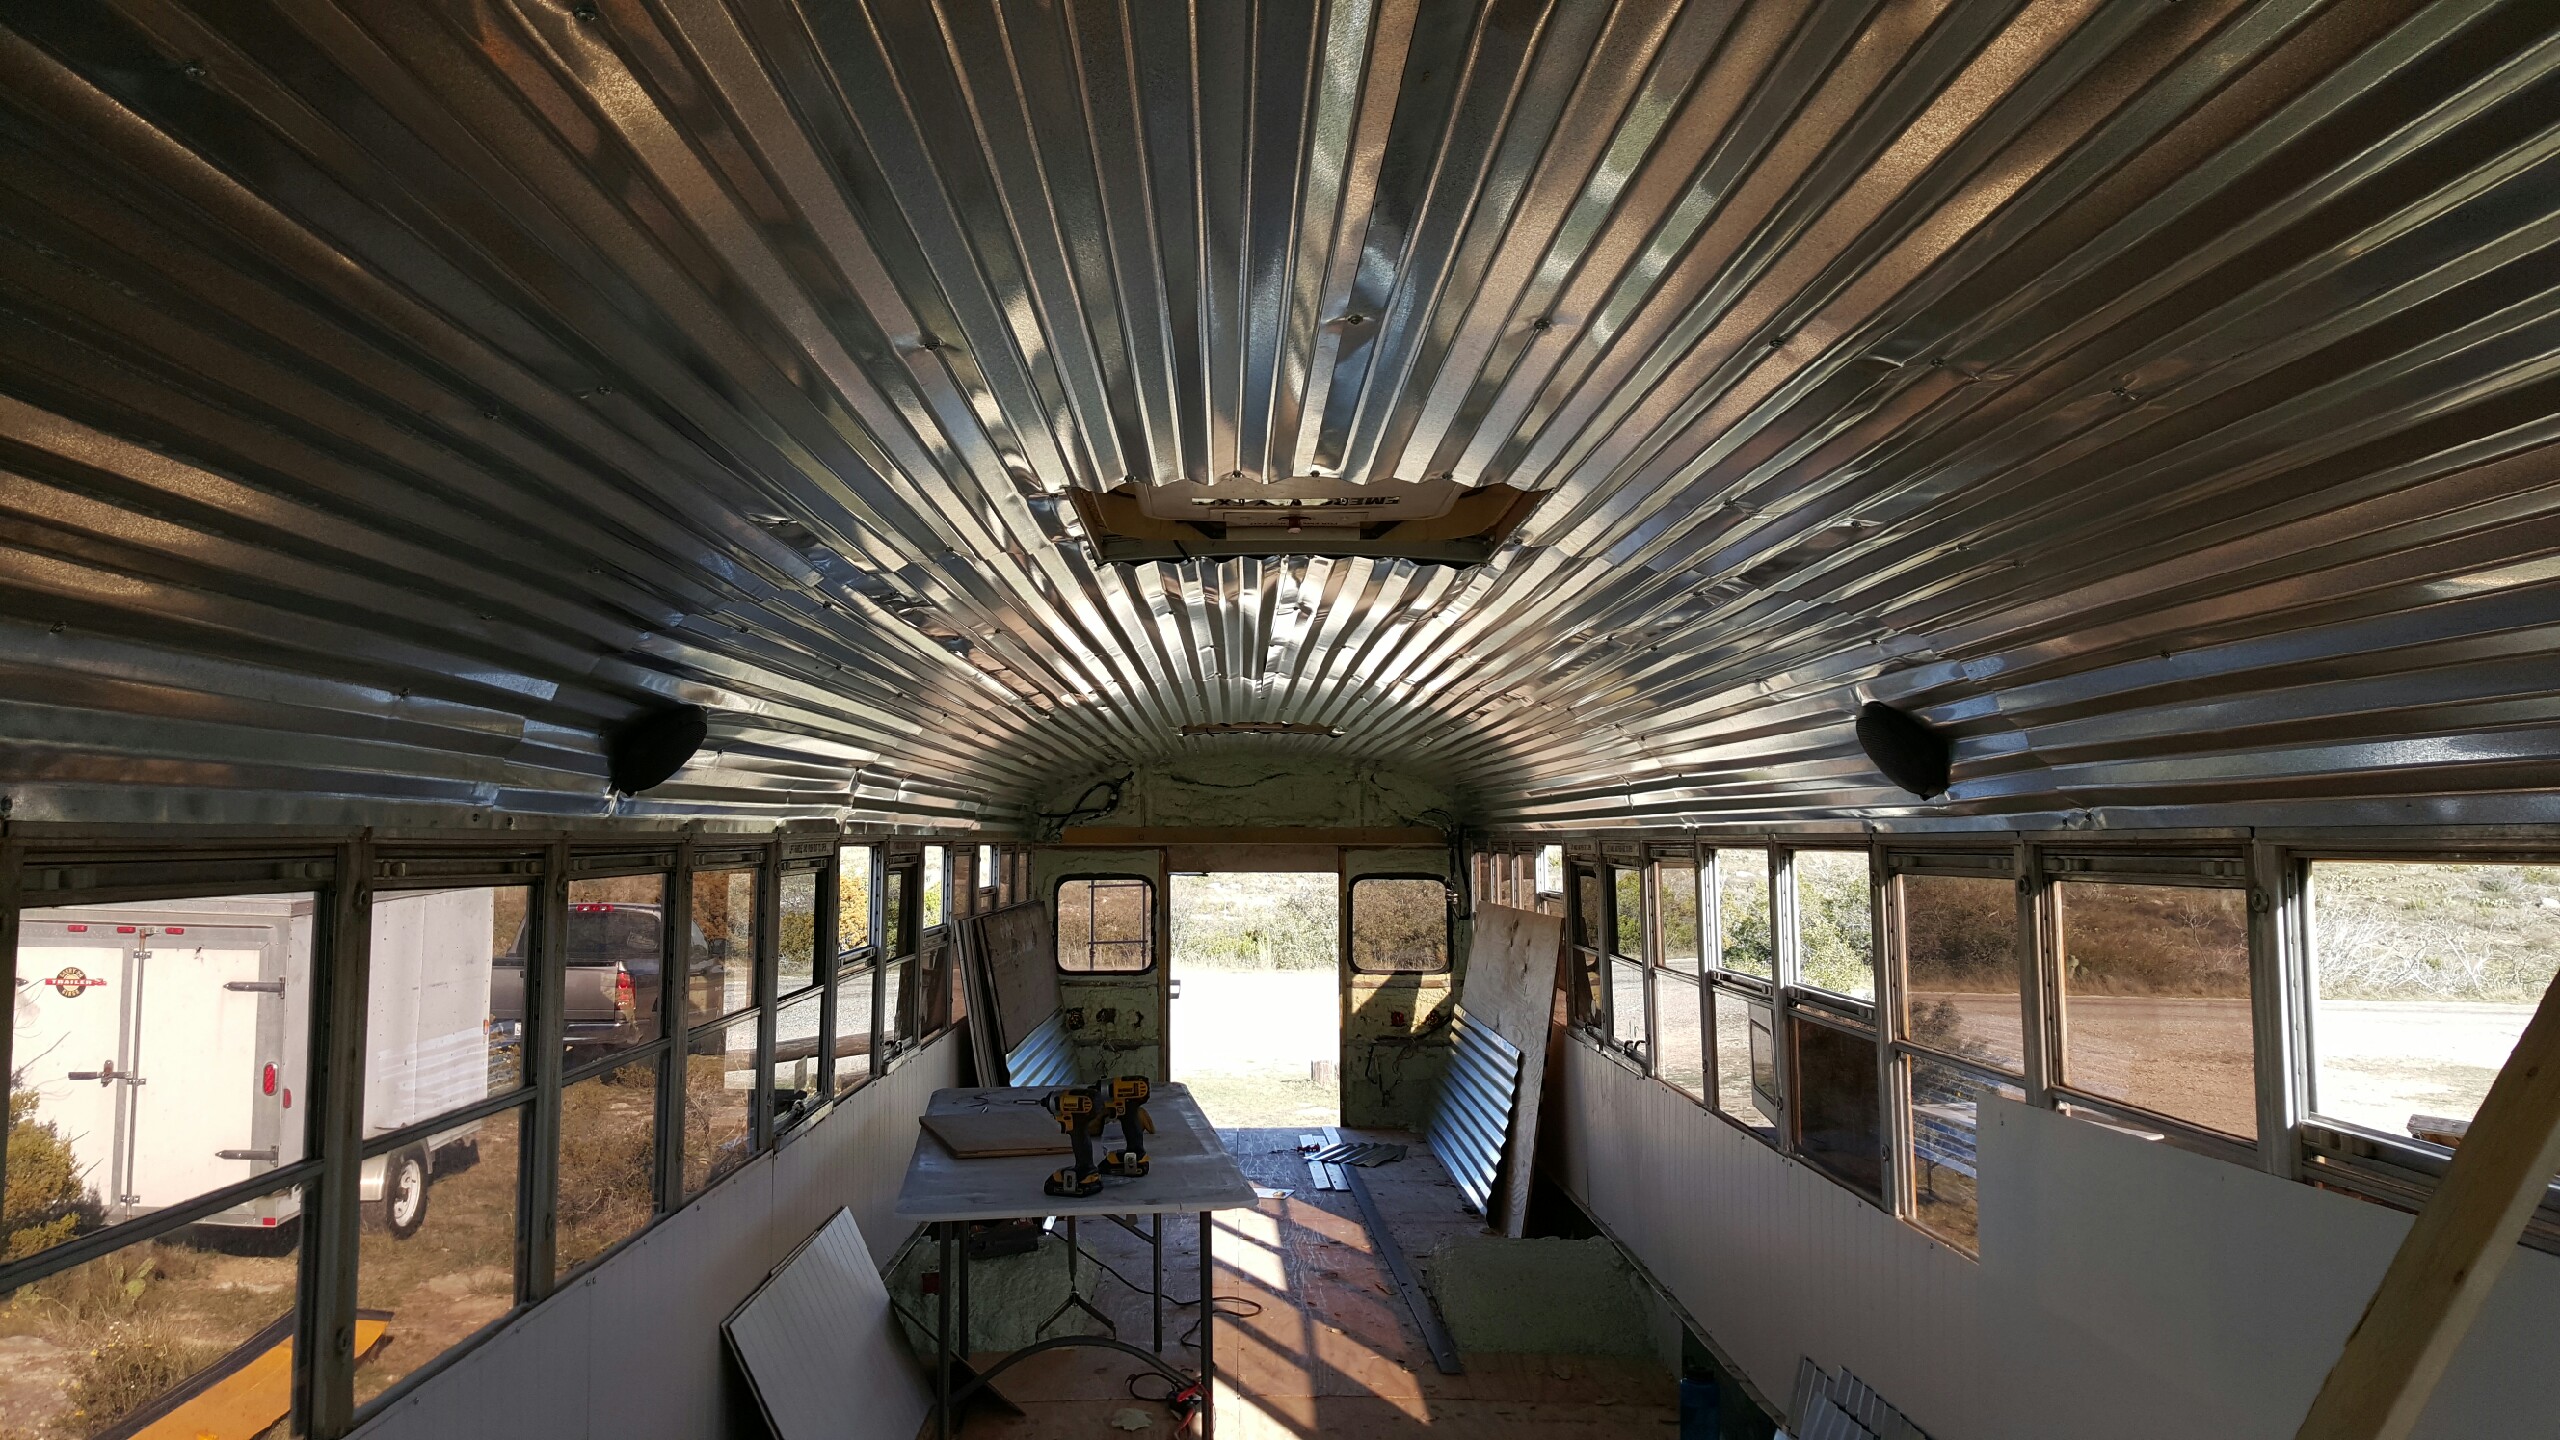
We had the idea of a tin roof for the ceiling as a back up plan while we were brainstorming ideas before we decided on the FRP board. I was worried about rust and road noise…maybe it was to much metal? But then we were out off options and determined we would have a bigger success with this material, so we went for it.
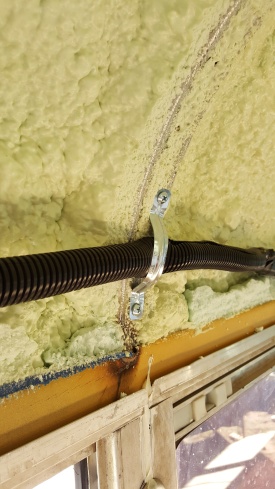
We had to secure the newly loomed bus wires up so we could fit the tin panels over them easily. The loomed wire fit really well inside of the grooves on the tin roof. So, the prep for that took a short while…yay more TEK screws for metal. Guys, if you don’t know, I am not kidding. That was hard. I burned up screws trying to push them in. It was pretty eye opening for me lol. We attached also with washers on the outside of the small tek screws so the screw head would not eventually pull through the tin.
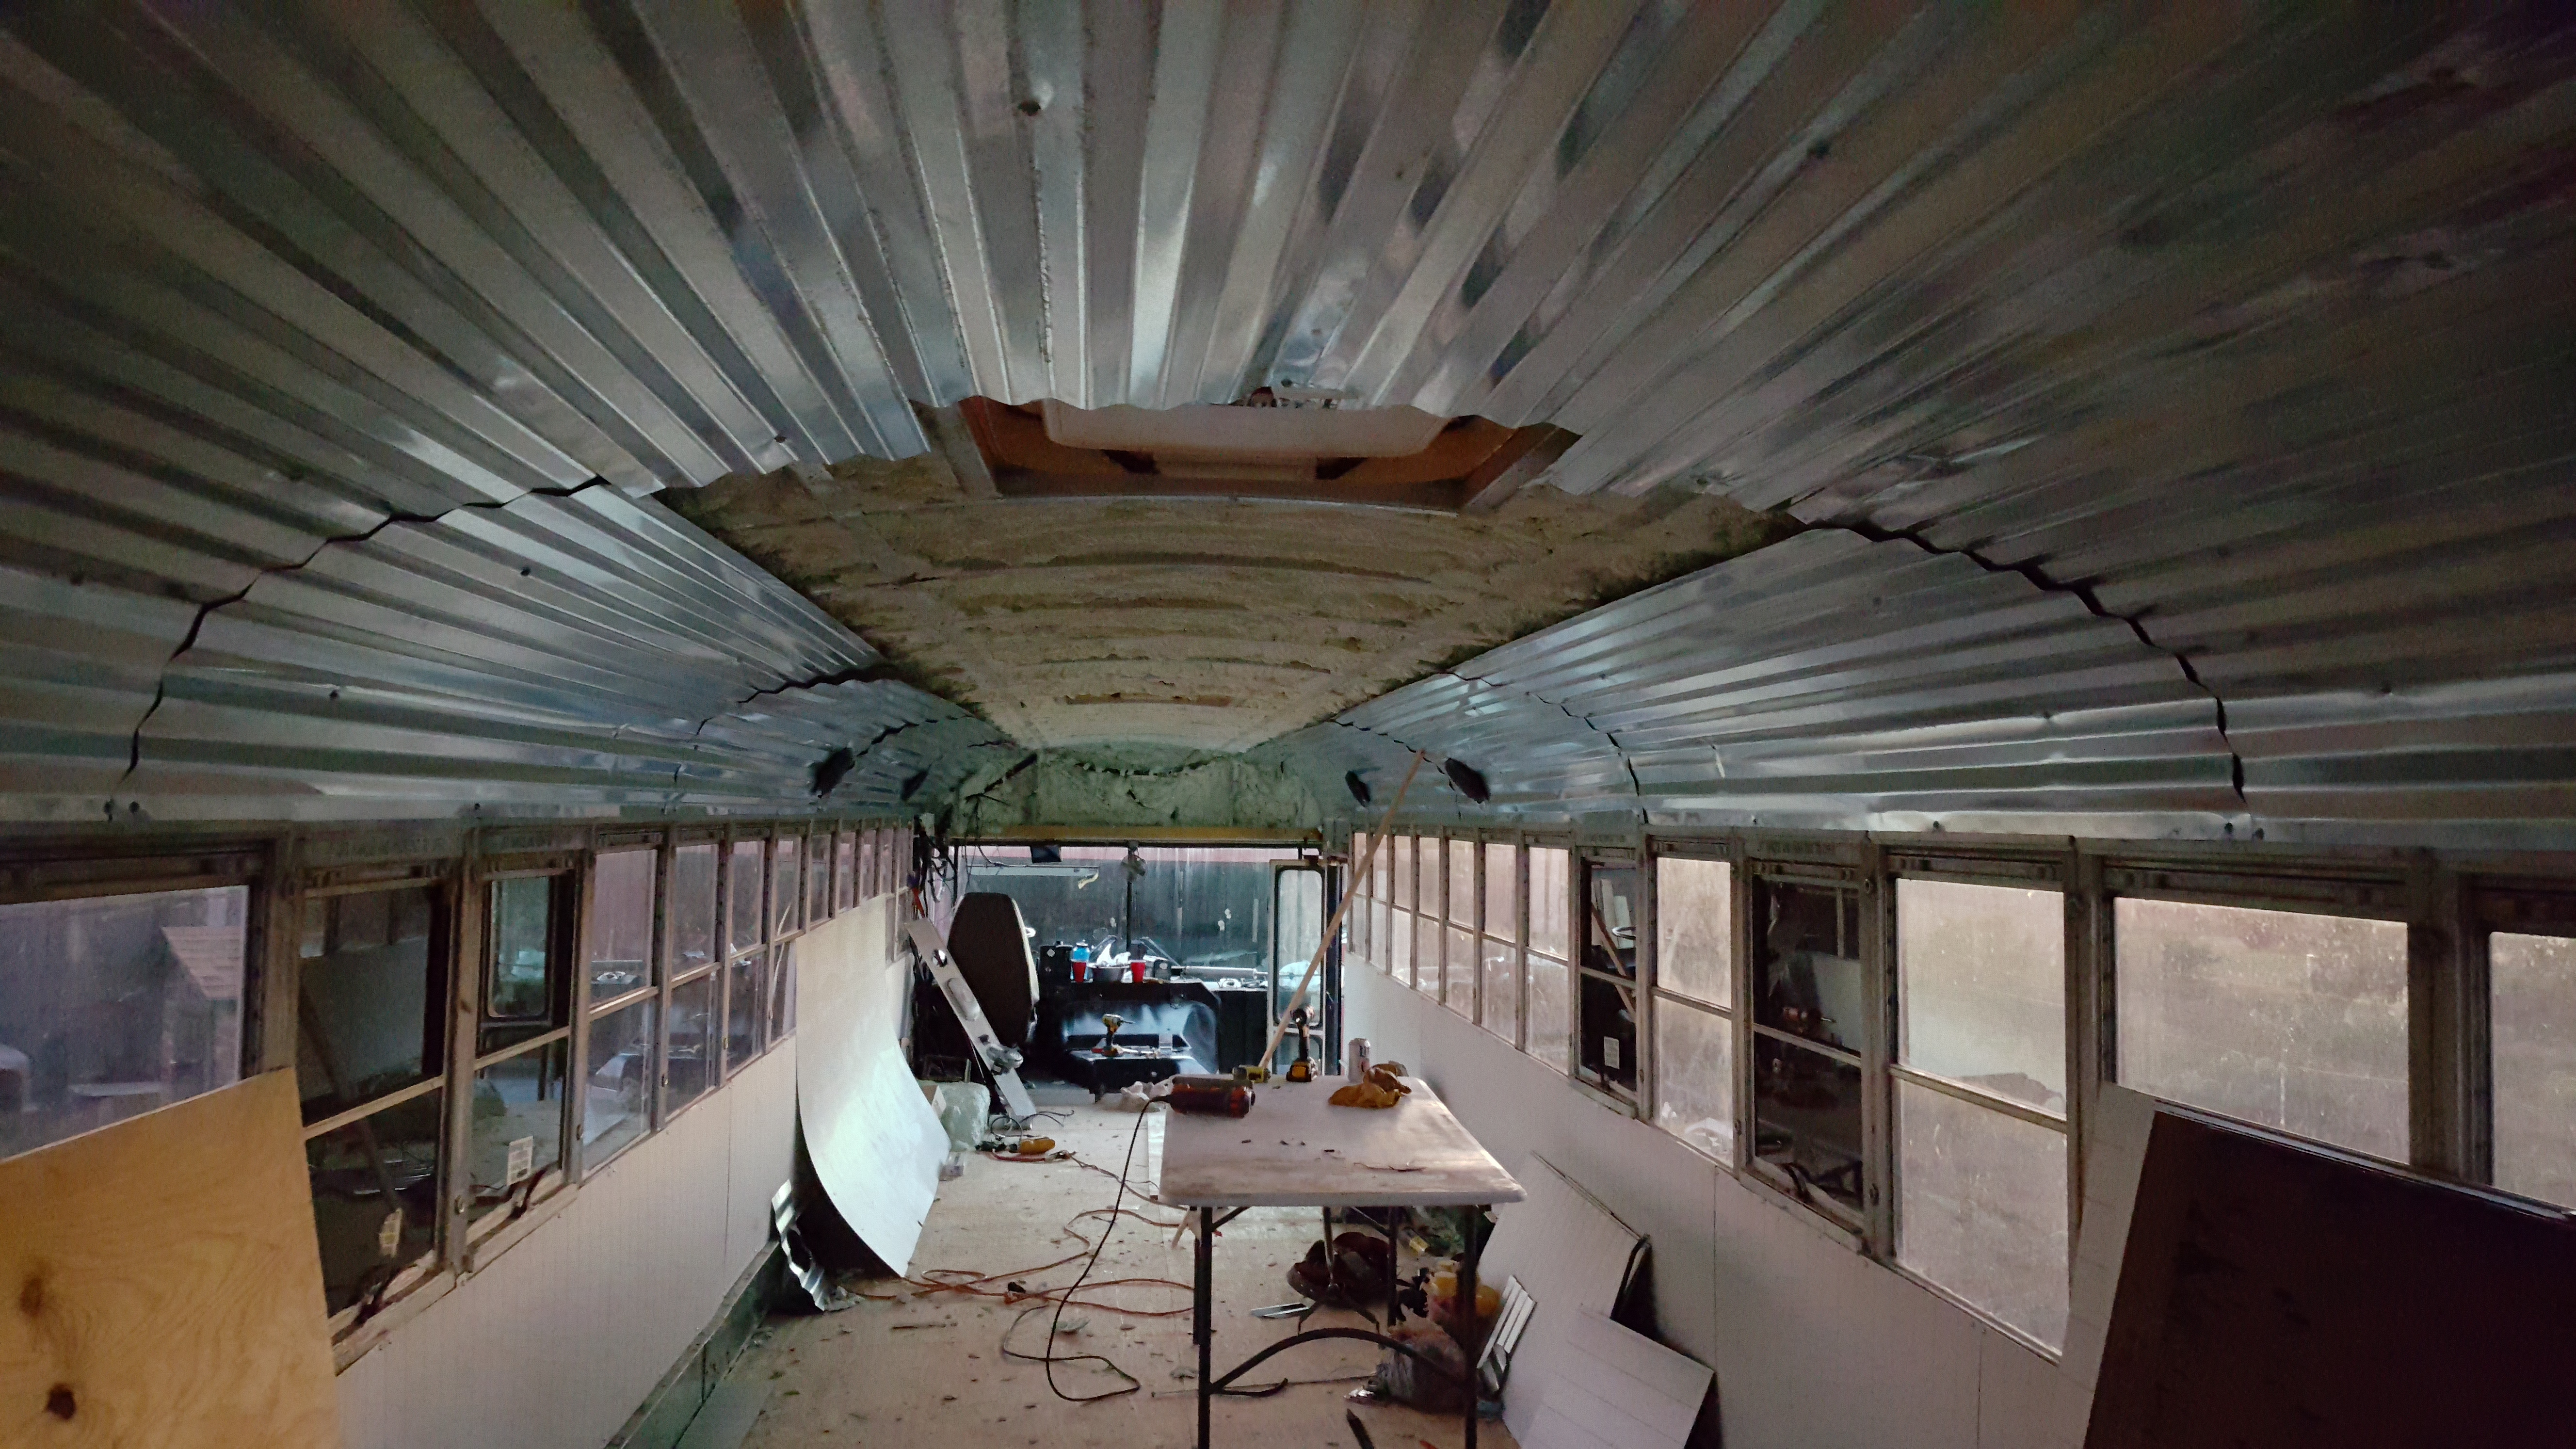
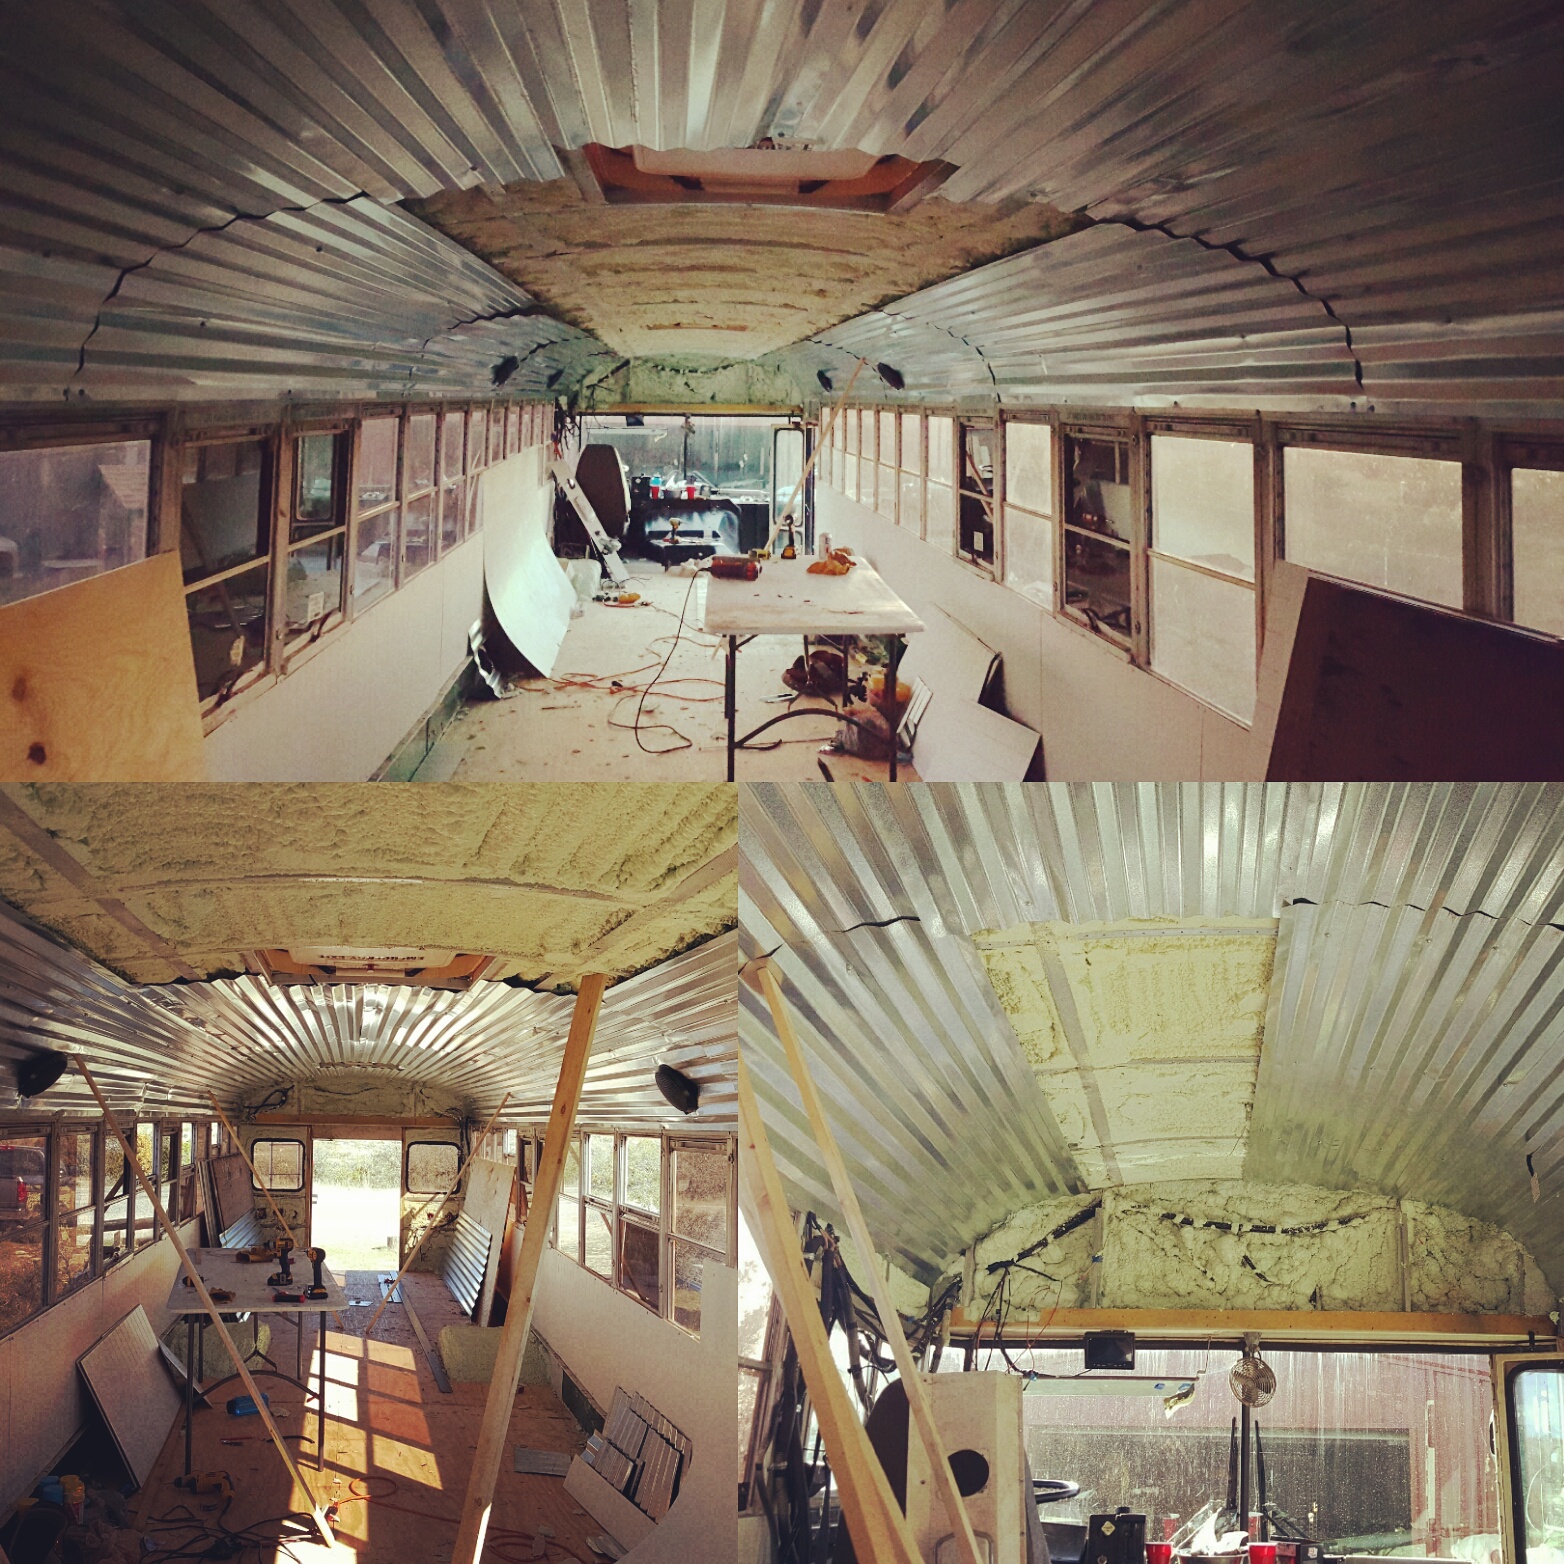
I wish now that we would have added some sort of a vapor barrier before attaching the panels. I did not think of it then, nor did I have an understanding of what we were really doing before hand, haha. At least I can admit it right? But that is why we started this journey, to learn. The vapor barrier would help break up the contact between the tin metal roof and the metal ribs we attached it to. So when it is cold outside the bus and warm inside, there is condensation at the screw points. That would be one of the “If we converted another bus or worked with a metal building again, this is what we would do” lesson that we would add to that list.
 So if you are planning on following suit with this build and using this material for the ceiling, and you could even sacrifice the head room (which we really couldn’t since the hub is 6’2”), maybe even spray foam over the ribs or add wood over the ribs then add the tin. Or just do a plastic sheet. I hear that would be sufficient as well. And make sure you put screws on every rib…this will reduce vibrating road noise while traveling.
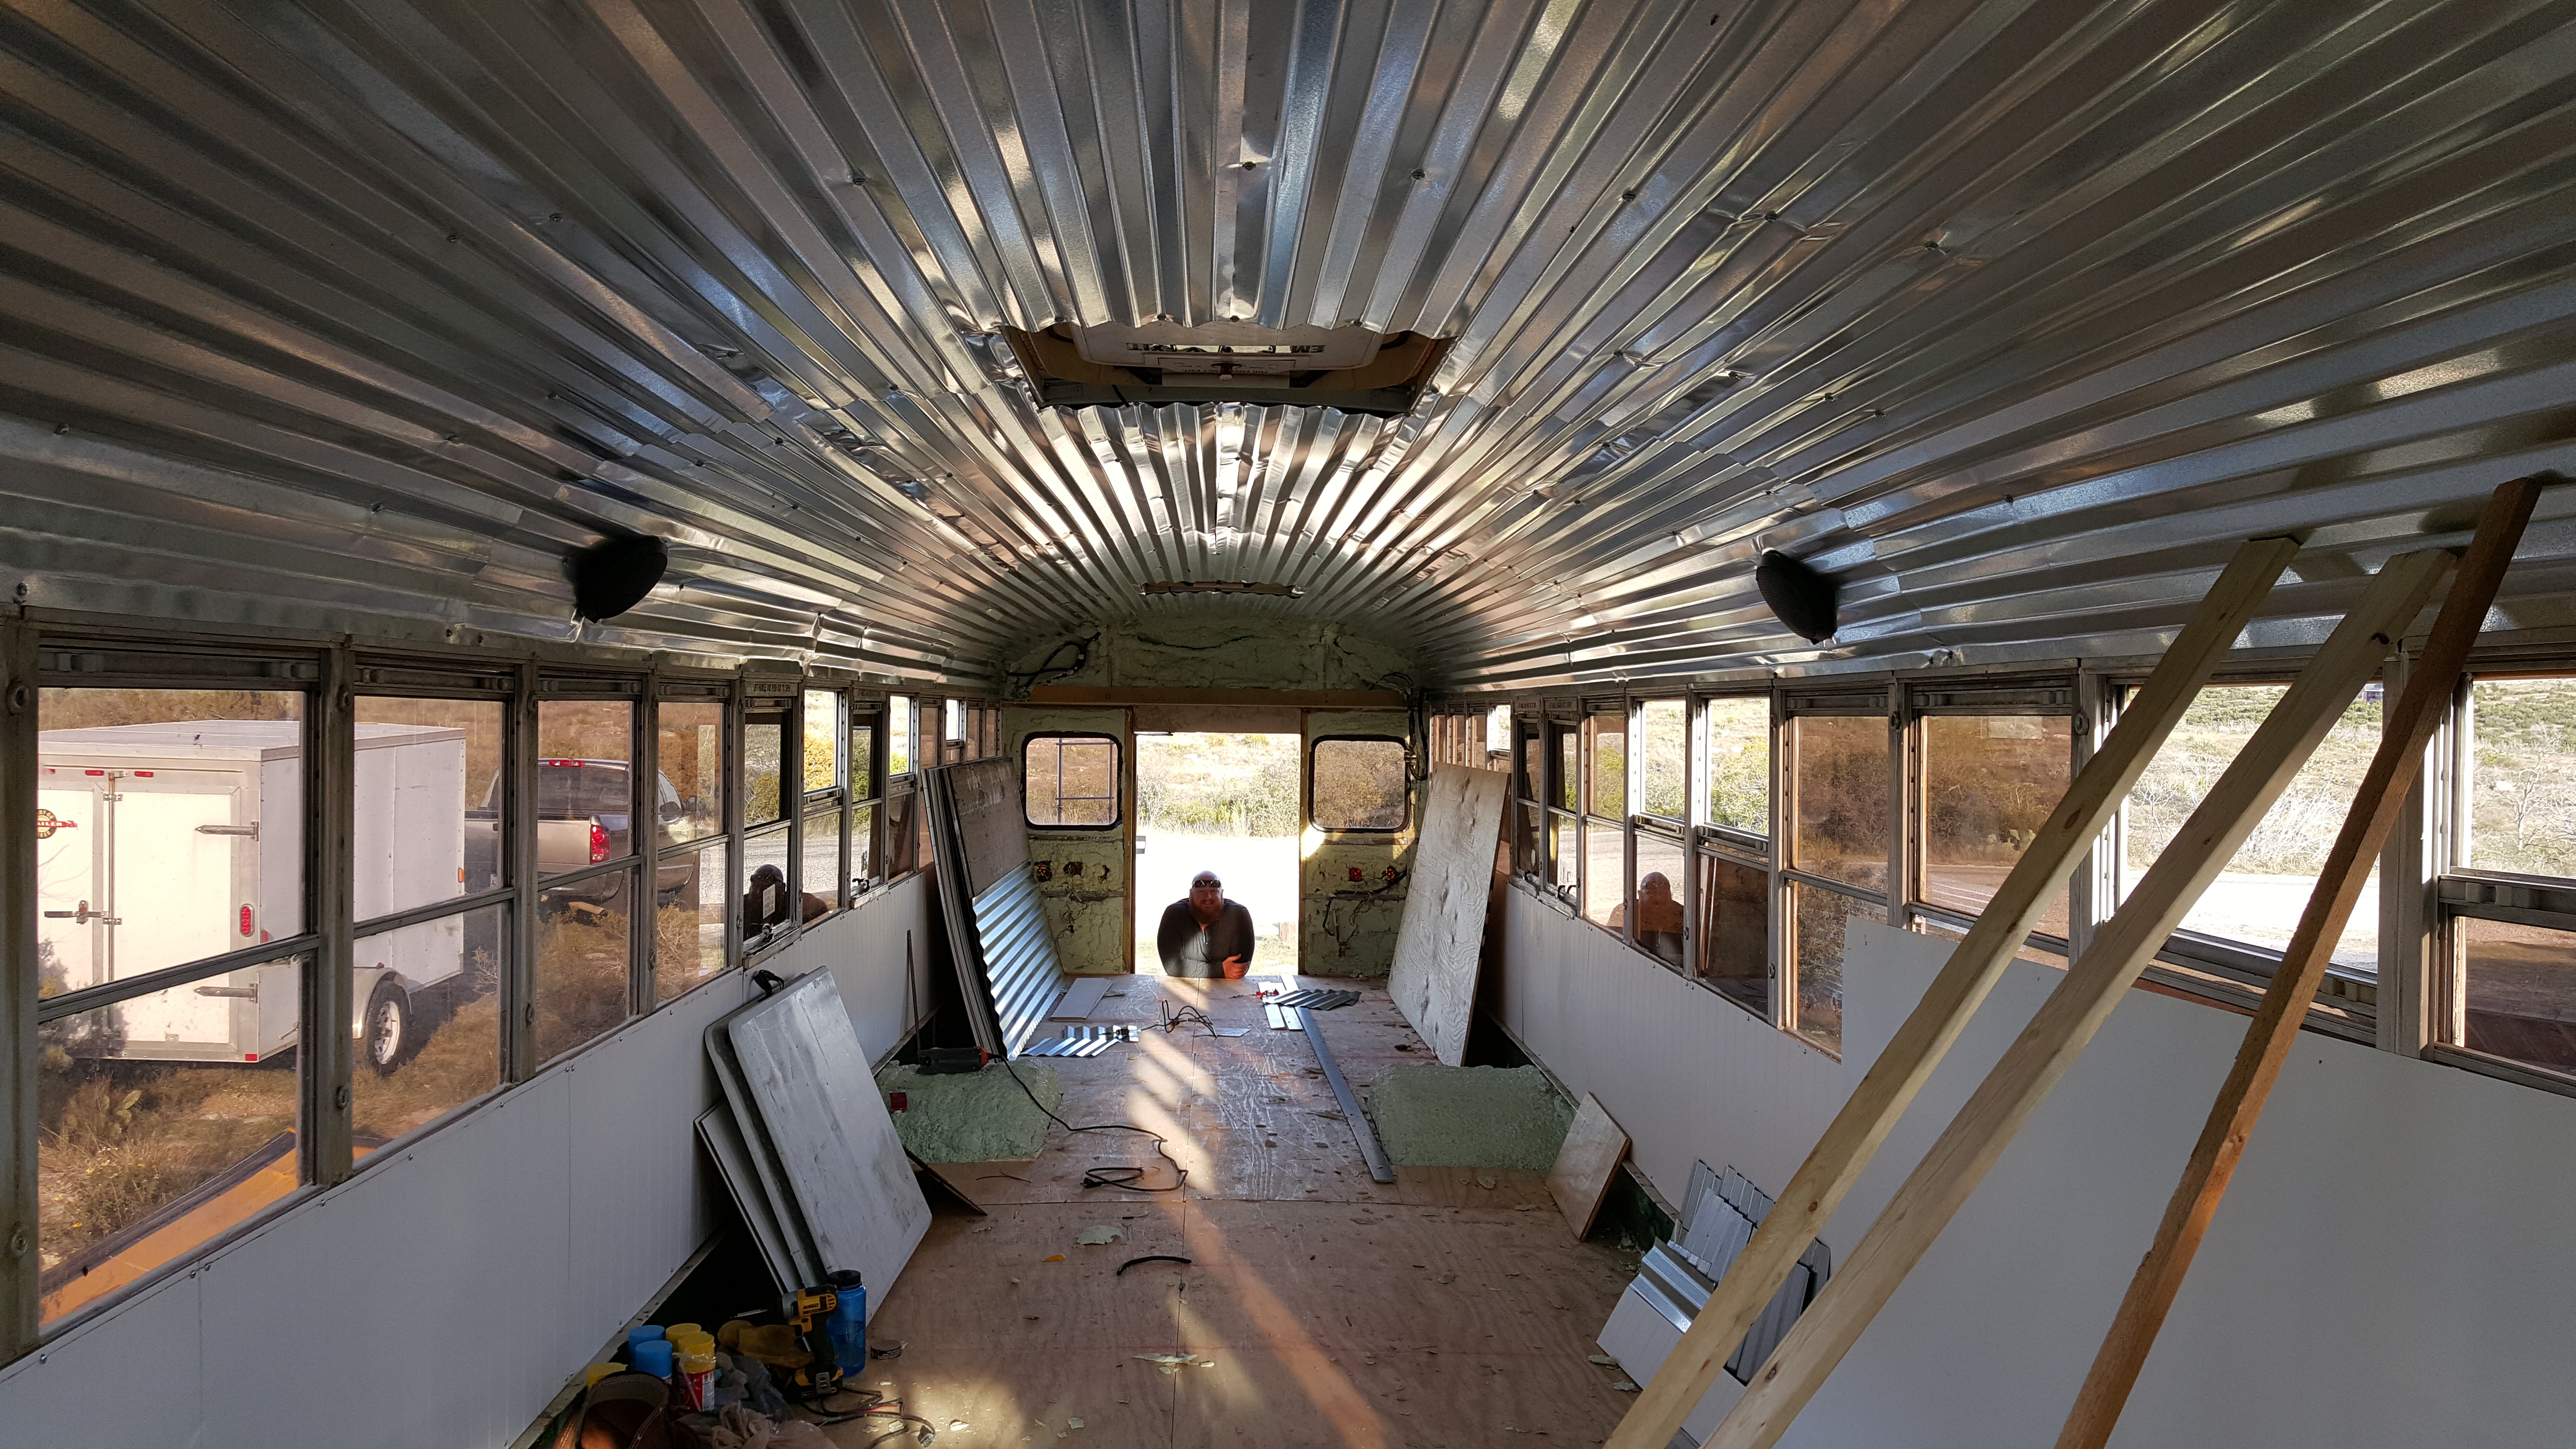
 Then, the transformation process! We laid 4 pieces across the width of the buses long ways to get the most our of the space and to be sure we had enough places to screw in the panels. We also used 2x4s to brace the panels as we were screwing. Was like having two extra sets of hands! We made sure to have a couple of “ridges” overlap each other when putting them together, as well.
And we worked….
And screwed….
And sweat until we were done!
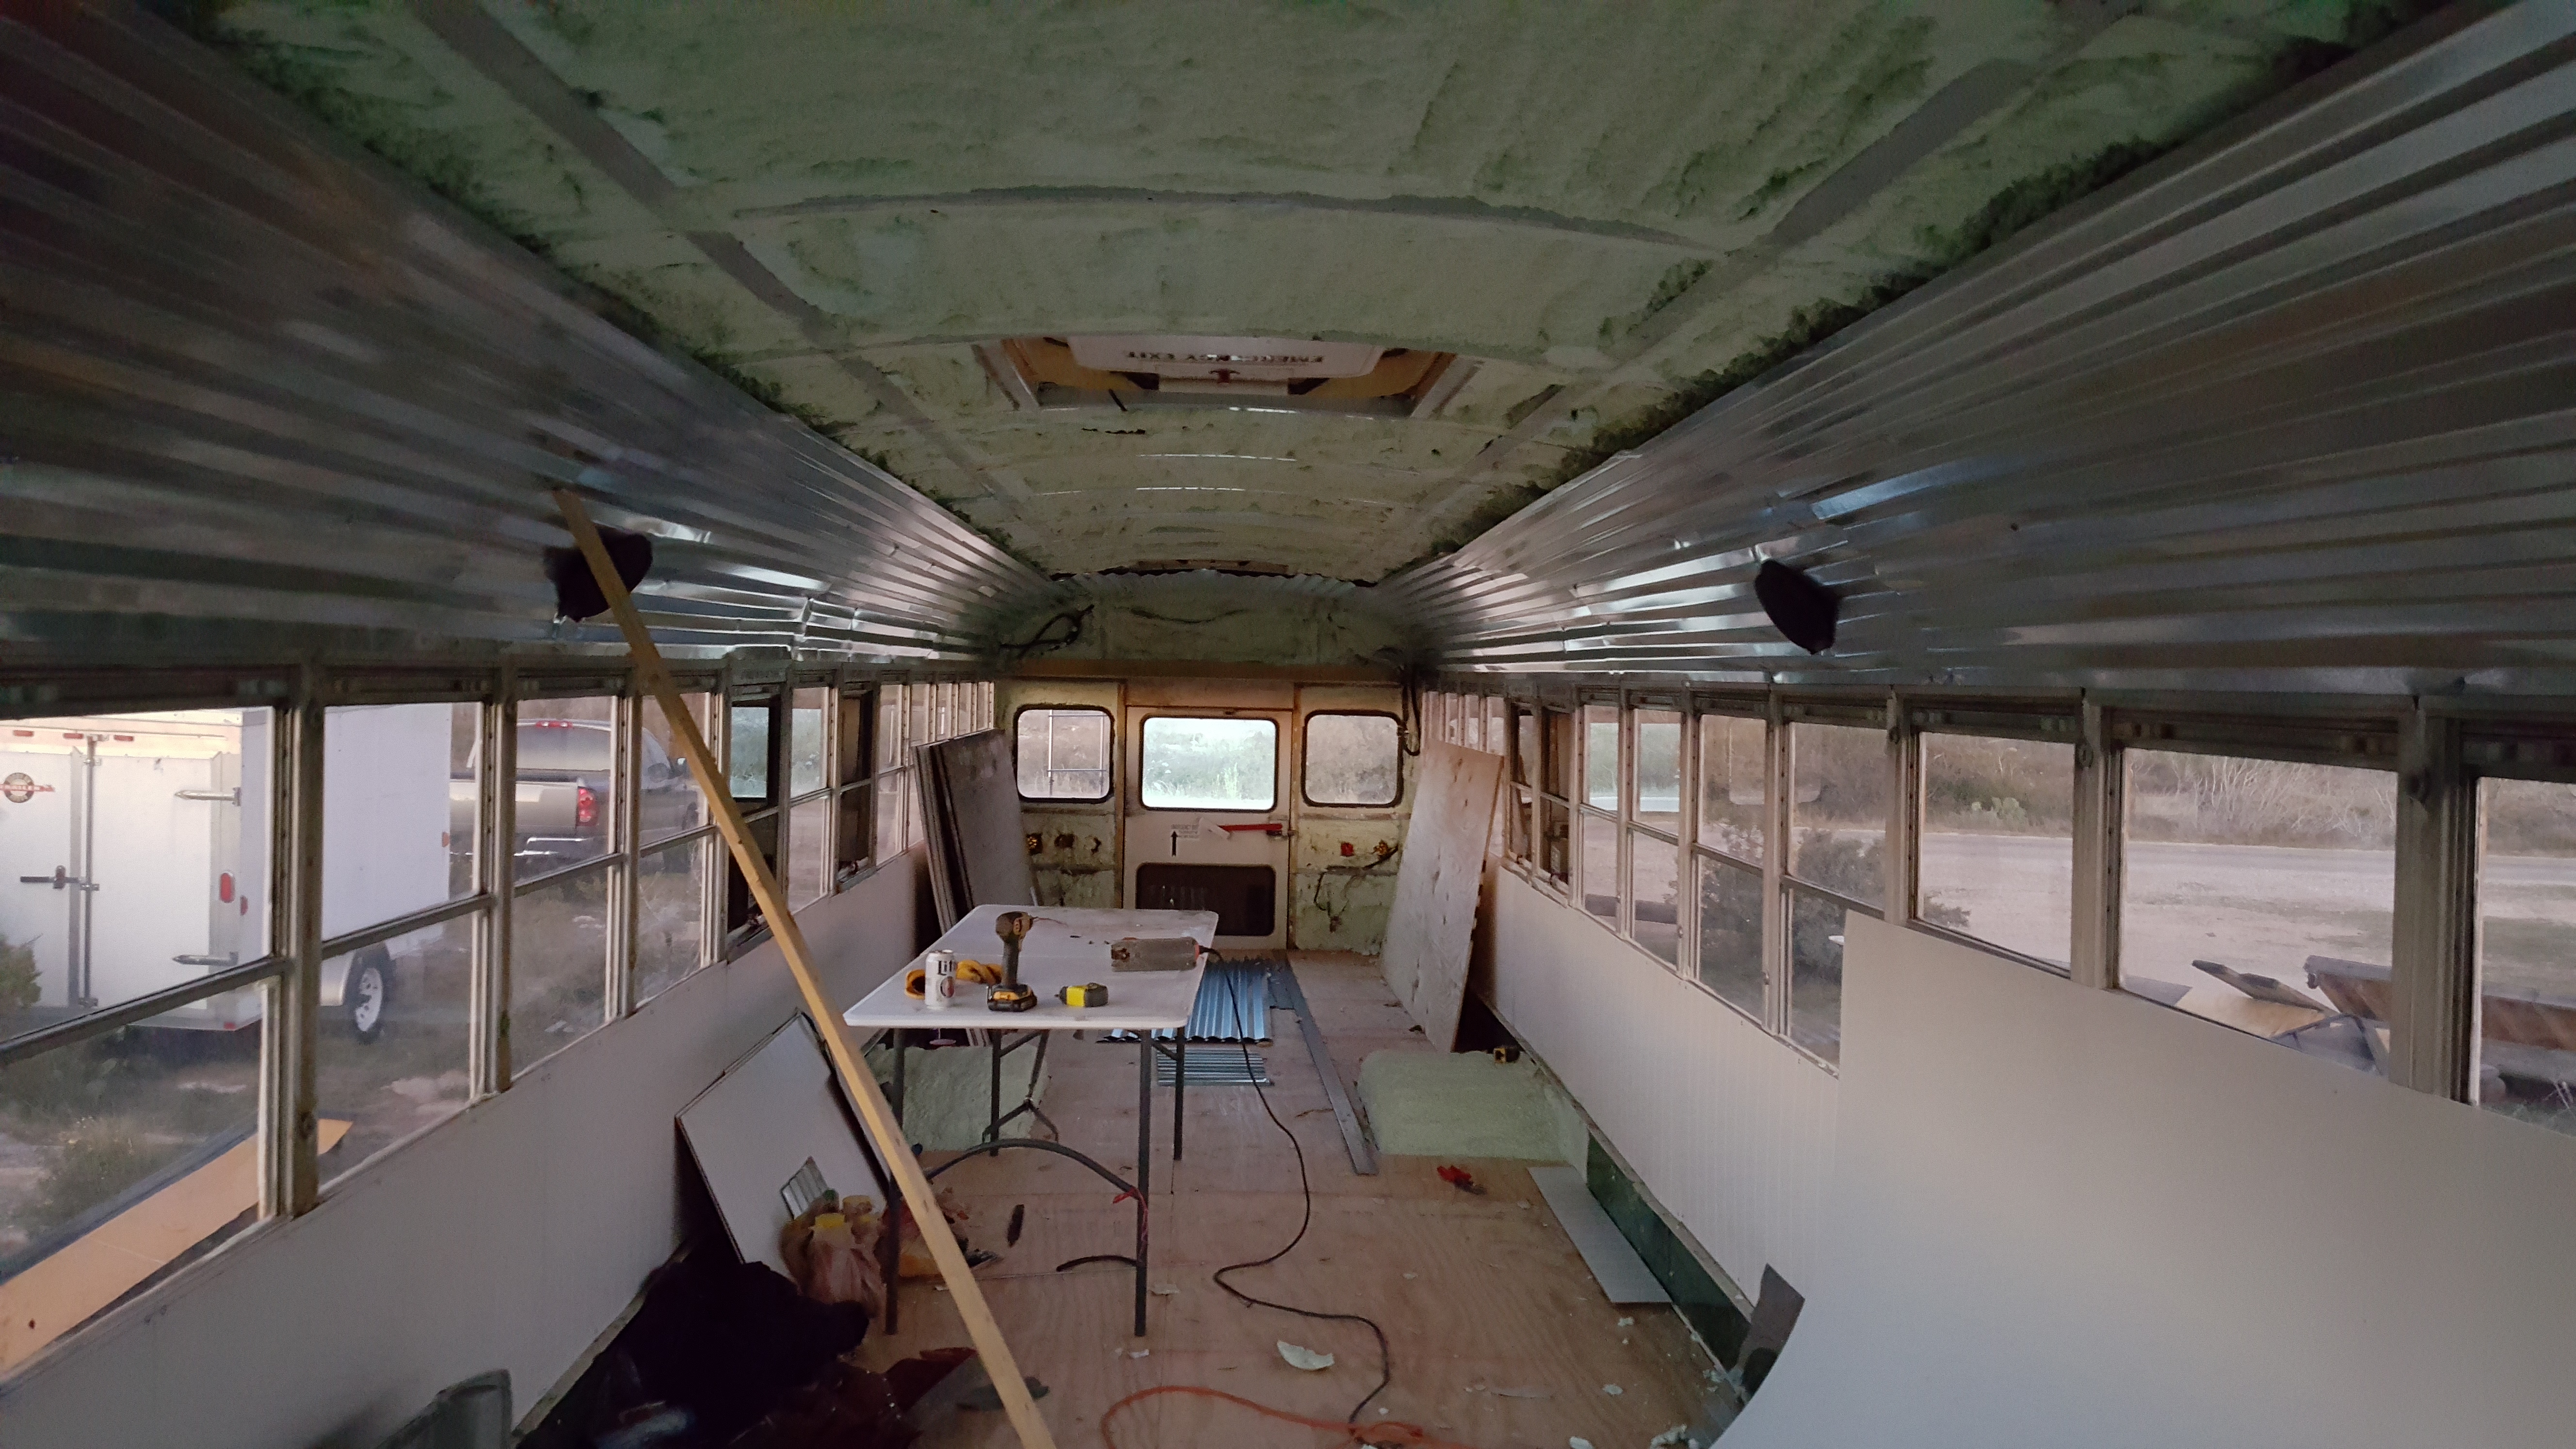
And how sweet it was 🙂 We were so happy with how it turned out too. Made it even more open to us and the reflective material really brightened the bus up. Old Chitty Bang looked like a brand new bus!
Crab painted this piece that came out of original Chitty Bang since he will be doing most of the driving 🙂 Why am I not surprised at the colors? lol.
Next we put in a brick wall! Ok….faux brick wall…lol. And added some braces to the front and rear headers of the bus:
Stage 24: Personalizing the Walls and Adding Braces
or
Back to Stage 22: What We Thought Was Next- Hanging Walls


Leave us a message!