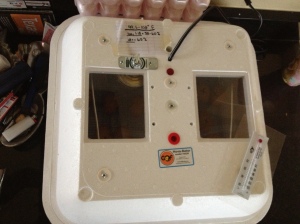
We have recently decided to begin the sustainable chicken life cycle here at Crab’s Juice N’ Stuff’s homestead. We have grown baby chicks into full grown chickens, added a rooster (Roo) to the family, and decided to use an incubator for a fool-proof experience. I have a couple of good brooder hens, but I do not have total faith in them yet :). I started with the Hova-Bator incubator, added an air circulating fan (as this helps with oxygen and air flow), an automatic egg turner, and a thermometer/hydrogometer. I have heard that some people have been very successful with hatching baby chicks without turning their eggs at all, however, I try to leave no room for issues as they always find me if i skimp ;). Some people will manually turn their eggs. Just mark an X on one side of the egg, and an O on the other side. This is so you can track what side your eggs are on the next time you need to turn them. You should turn them 3 times a day (morning, noon, night). I often get overly excited and want to jump right into a new project, so I took my time and read reviews on many incubators and the “how-to’s” of chicken hatching and I felt ready to go… I thought!
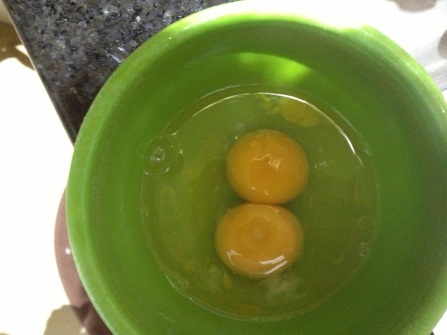
March-April is the best time for collecting fertilized eggs, and catching the Rooster and his ladies rubbing feathers;) Although the kids may be upset thinking Roo is hurting the hens by standing on their back, but I assure them that it is what happens and how we have baby chicks in the eggs. Not knowing which eggs are fertile and which aren’t, you have to leave this part by chance or do a probability ratio by cracking some “possibly fertile” eggs and locating the blastoderm on the yolk (see image below). You will see a small white circle on the egg, and you may need to turn it over to locate. If even 50% of your eggs have a blastoderm, your chances are still good of having a successful hatch. Don’t forget to date your eggs! I wrote the date I placed mine in the incubator just so I would remember. I also spaced my chicks a couple of days apart, so this was important for me to track.
You will want to have the incubator all set up and ready to go for at least 2 days before placing eggs in there because the temperature and humidity will fluctuate until you can get it all set right. This was also a lesson learned! My temperature got up to 104 degrees the first 24 hours after I placed the eggs in there.
**Temperature should always remain at 99.5-102 degrees F!!**
Days 1-18 humidity should be 55%-60%
Days 19-21 humidity should be raised to 65%
Once you collect eggs over a few days, you can put them all in the incubator at the same time to start the incubation process. Unfortunately, I did not use my entire brain and placed the eggs in the incubator on each day I collected them. So my chicks would be hatching on different days, *duh*! Either way, as long as your eggs are less than 14 days old, they should have a good chance of being successful.
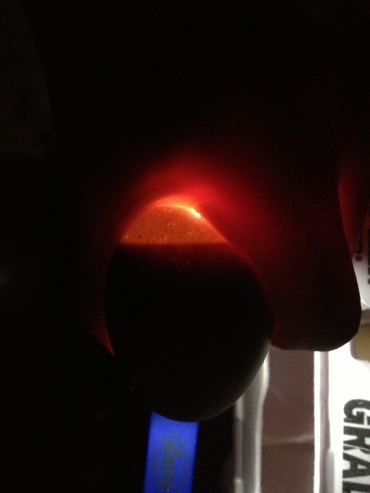
To track your chicks progress, it is important to candle the eggs to see the process. Do not use a huge flashlight like I did! I blinded myself at least 12 times because my hand was not big enough to make the tiny light opening I needed on each egg. So my awesome husband gave me his small LED flashlight to use and this was much better. They sell flashlights for incubating (do not waste your money on some expensive one as they should be under $8). You can definitely use a flashlight or even a brooder light as I have seen some people do. You just need to cut a piece of cardboard to cover the large part of the light and cut a little circle the size of an egg to place your egg over.
On Day 8, you will begin to see some veins and a dark blob (the blastoderm or now baby chick) when candling. These are all my own pictures so you may have to look closely to see the veins, but still very cool.
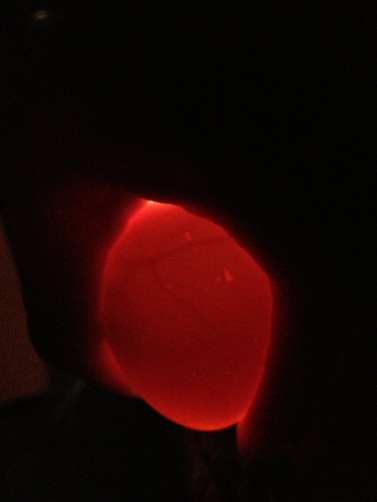
On Day 14, you will want to candle again to make sure you see movement of some kind to make sure your eggs did not expire. If they are rotten eggs, they can explode in the incubator and leave a stinky mess! I actually had an egg that stunk for a few days in there, luckily I sniffed it out and removed it.
I didn’t take a picture of this one because my light is not as awesome as most people’s, but I did see the dark mass (chick) and the air pocket at the top of the egg, and as I watched the mass I could see the chick’s breathing movement, and even if I couldn’t I still kept it because I am a novice and always root for the underdogs :).
Once Day 19 arrives, the egg turner comes out and the humidity goes up. I candle one more time to make sure I see something in the egg.
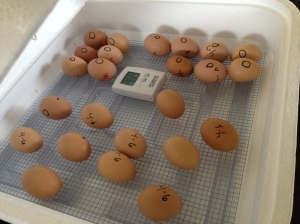
Here are some hatching pics I took! This was the most exciting thing I have done in a while and it was really awesome to share with my girls :). Once they began pipping (pecking out) on Day 19, they hatched the same day or early the next day. I could even hear them chirping inside the egg! Once they pecked a little hole, their chirps were heard throughout the house! It was really exciting. It almost seemed like from some of their excited chirps the other eggs started to move around…I guess its contagious :)!
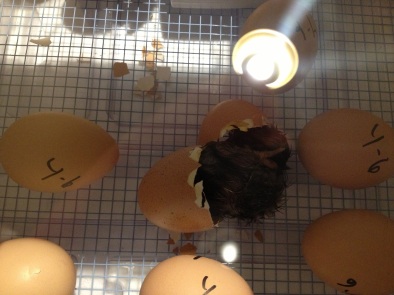
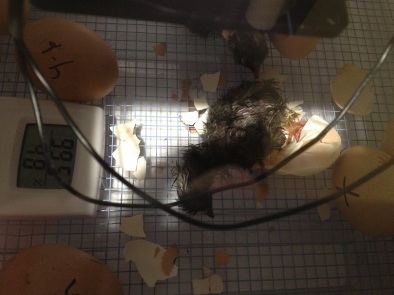
Unfortunately, even with all of the new life coming into the Crab Shack, there are some chicks that just don’t make it. I feel extremely fortunate that I had 15 out of 25 make it. I waited until the 22nd day to start cracking the “non-pippers”. They were fully formed chicks inside, just never started pipping. Some reasons that I found could be that my temperature was too high or low or the incubator was opened too often (Complete possibility!). The picture below shows the only chick that did start pipping, but never finished.
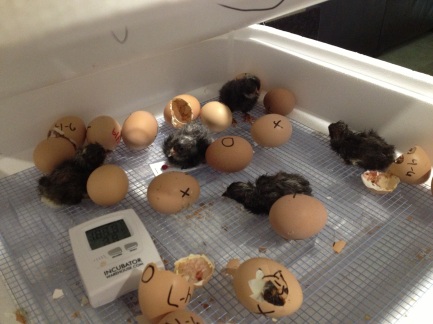
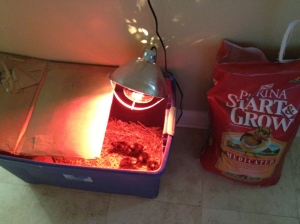
Once the chicks were dry and walking around decently (after 12 hours or so), I placed them in their brooder pen with some Purina Start & Grow Medicated grain, and some water with pebbles in it so the new chicks wouldn’t drowned. Apparently, they feel the need to throw themselves in water soon after hatching, if it is available. I also removed the cracked shells once the chicks were out. Be careful doing this as some chicks can still be attached to their eggs, reminds me of an umbilical cord. On some that had carried it around a while and couldn’t seem to shake it, I just gently pulled it off in the center of the cord. This way I didn’t pull it from the chick, but it could walk around without having a big ole’ trunk 🙂
Here are some things that I did that I had read in other places that may have been a “no-no”, but worked for me anyway:
- Helping chicks out of their shells: Some people say don’t do it, others have done it and had no problems. At first, I really wanted to help them, but I also thought, “Well if it can’t make it out of the shell, how will it survive the real world?” So I watched a few come out, and then decided to help others and both were fine. I only helped them once they a good crack going 🙂
- Letting the Temperature get too high or low: Of course no one wants this to happen, but unless you are watching your incubator 24/7, it may happen. Mine climbed to 104 for about an hour, and dropped to 93 when removing chicks form the incubator. It took some calibrating to get it back to the correct range, but I got it.
- Removing chicks before 24 hours: I let the first few stay in the incubator for 24 hours, but once they were moved and settled in the brooder pen I went ahead and moved the other chicks 12 hours or more after hatching. They say chicks can be left in the incubator 24-36 hours after hatching as they do not need food and water right away.
- Letting the Humidity levels drop: I had the hardest time keeping humidity levels in my incubator. I would spike it or let it get too low, but it did stay at a constant 40-50%, and once Day 19 arrived, I just put more water in and tried to keep it at between 50 and 65%. I had chicks hatch at 40%, so I think if you are doing your best, monitoring it, making the changes as needed, and not opening the lid too much, you will be ok. Then again, it’s one of those things that may work for some but not for all.
- Turning Eggs: Since I had an automatic egg turner, this wasn’t really an issue. However, since my chicks were spaced a couple of days apart, when I had to remove the egg turner for the first Day 19 chicks, I had some that still “needed” to be turned. Well, they got knocked around by the other chicks in there trying to walk around so I just let them be. I had 3 out of 5 hatch of the ones I did not turn the last 2 or 3 days. Some people do not turn them at all, however some people say it’s apart of the natural process of what the mother hen would do. Others just like the personal attachment they have with the chicks through their development. I say, do what makes you happy. As for me, I will use my auto egg turner.
My Suggestions
- Buy a digital thermometer and hygrometer: ($13 on Amazon. I got mine from Incubator Warehouse on Amazon). You need this to measure the temp and humidity throughout the incubation period. Do not rely on the plastic thermometer that comes with the incubator!
- Make sure your incubator has as Air Circulating Fan: I have read that some chicks die in the egg very early b/c of poor air circulation. This was sold as an optional attachment, and was simple enough to put together. You have to wire it if you get the Hova Bator, but they have an awesome you tube video if you are electrically illiterate like me. I have installed ceiling fans many times, but never this way :). Once I watched the video, it was super easy.
- Get an Incubator with 2 windows: I think it may be a personal preference because you can see on either side of the fan, but I have read that it helps keep the temp constant too.
- Get an automatic egg turner: My husband always says to make something as easy as possible so you can be the most successful at it. The easier it is, the more you will be involved. I agree with this because I learn the hard way a lot! I end up working really hard at something and watch it fail, then I figure out how I could have made my life much simpler. So learn from the smart man, and be the wise man!
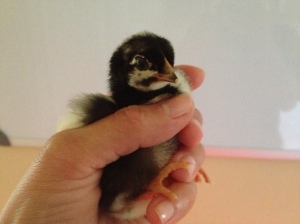
15 out of 25 is not bad for my first time! I definitely urge you chicken lovers to experience this because it truly is awesome. I eventually want my hens to do the hatching, but I also wanted to try it on my own.
Good luck and happy hatching! 🙂


Leave us a message!