TheCrabsHomestead

7: School Bus Rust Removal Part 2 of 3

Stage 7: The Rust Double Tap
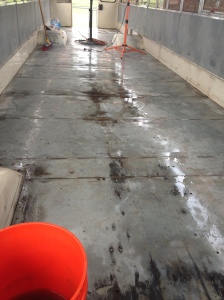
2 Weeks Ago this is what the floor looked like after Sanding the floor and applying vinegar solution. Over that time
2 Weeks Ago this is what the floor looked like after Sanding the floor and applying vinegar solution. Over that time “rust dust” collected and had to be removed, shown below:)

This week we began our task at completely abolishing all floor rust we could see by doing one last sand job over any Rusty spots and using a new fave product, Corroseal.
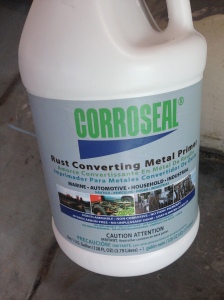
Corroseal One gallon was all I needed to cover the entire floor, and trouble spots I did twice over. I actually have about 1/4 Gallon left, which I plan on using on the roof/sides if I see anything.
Corroseal
One gallon was all I needed to cover the entire floor, and trouble spots I did twice over. I actually have about 1/4 Gallon left, which I plan on using on the roof/sides if I see anything.

This product was recommended to me by a friend and I have read about it on the Skoolie Converters Facebook Page. I bought one gallon from Amazon via our Prime Membership, cost about $54.

Corroseal 82331 Water-Based Rust Converter, Gallon
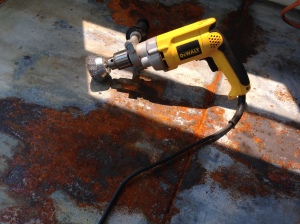
Before sanding the collected Rust Dust. Used the drill and wire brush attachment, then blew out the bus to get any dust/dirt/debris out.

I only used my drill and sanding wire brush attachment to sand the “Rust Dust” off of some spots I saw on the bus. We already sanded once, but it had been about two weeks since we did it, and in the process we found a few windows causing water to come in, which will lead to more rust :/, which is why this Rust Killing Stage is so important!

This Wire Wheel Brush by Forney is a good one. As well as the Wire Cup Brush.
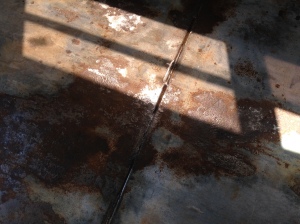
After sanding the Rust Dust that collected for two weeks after the initial sanding. Ready for Corroseal!

Then I blew the bus out with our leaf blower and started applying the Corroseal on a test area.
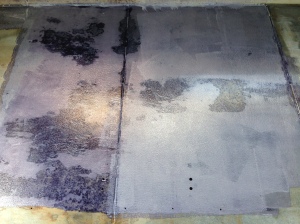
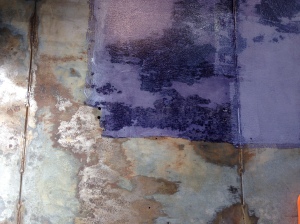
The test patch of one Corroseal application. Still wet, but the rust started to turn black just shortly after applying!

Wow.

Side by Side: Corroseal Treated (still wet) and Bare Bones no treatment

The directions stated once it turned black, the rust conversion process has begun. I felt like I extinguished a zombie plague as I watched the spots turn to dark black. It was working and I was super happy :D.
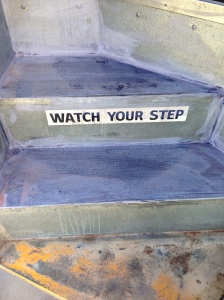
I used the paintbrush on the steps as it was much easier to apply, however it did cause it to go on thicker.

I used a foam roller, paint brush, and paint tray (nothing special) and was able to use the brush to paint where the floor and wall met, first, in sections. Then I foam rolled. I started in the back and painted my way out of the bus. I brushed over the wheel wells, under the fuel tank compartment (a simple black box covered it, but I wanted to make sure I got all around and under it), on the lower walls where I noticed some rust spots, and down the stairs.
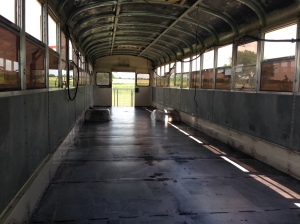
After Corroseal application (still wet in most areas) and you can already see results.

After a few hours, I came back and it was dry enough to apply a second coat on the trouble spots, just in case.
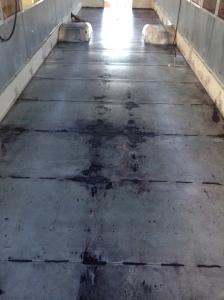
Dried to the touch, this floor is lookin flashy!

The next stage will be filling all of the holes on the floor and lower walls with Polyurethane so we can move onto building the floor of our Skoolie!! We were in no way paid by Corroseal, Forney, or Loctite for the review of our use of the products!

Stage 8: Filling Those Stinkin Holes

or

Editing Our Life Series

3 responses to “7: School Bus Rust Removal Part 2 of 3”

  1. You guys are amazing. The memories you will have and give your children is something i dream of! Being self suffecent.. It takes such a leap of faith! I love reading y’all’s life experiences.

    Like

    1. Thanks Sunni! Yes we hope the kids look back and realize that anything is possible as long as you work hard, are patient, and dream. We are always learning new things, and I don’t want them to think learning is just them doing workbooks during our school time. They are apart of this process as much as we allow them.

      Like

Leave a reply to The Crabs’ Homestead Cancel reply

This site uses Akismet to reduce spam. Learn how your comment data is processed.